After waiting for two years I got my Rivian #14201 delivered on November 12, 2022. Love the truck, and tested every feature and mode in the next weeks. The truck performed really well in the 5” snow that fell just before the year ended. Had to use my 1972 Jeep with no heat, defrost, or seat belts and a manual transmission to plow my ¼ mile driveway as I had been doing for the last 50+ years. By January 2023 the snow had melted and I started thinking that maybe global warming would save me from ever having to plow snow again. OK, forget about that, better get to work on a way to mount a plow on the Rivian and plow snow without burning fossil fuel and melting all the snow in the world.😉
FIRST A DISCLAIMER: I make no claims regarding warranties, performance, suitability, safety or any other aspect of this adapter for attaching a snow plow to an electric truck or any vehicle.
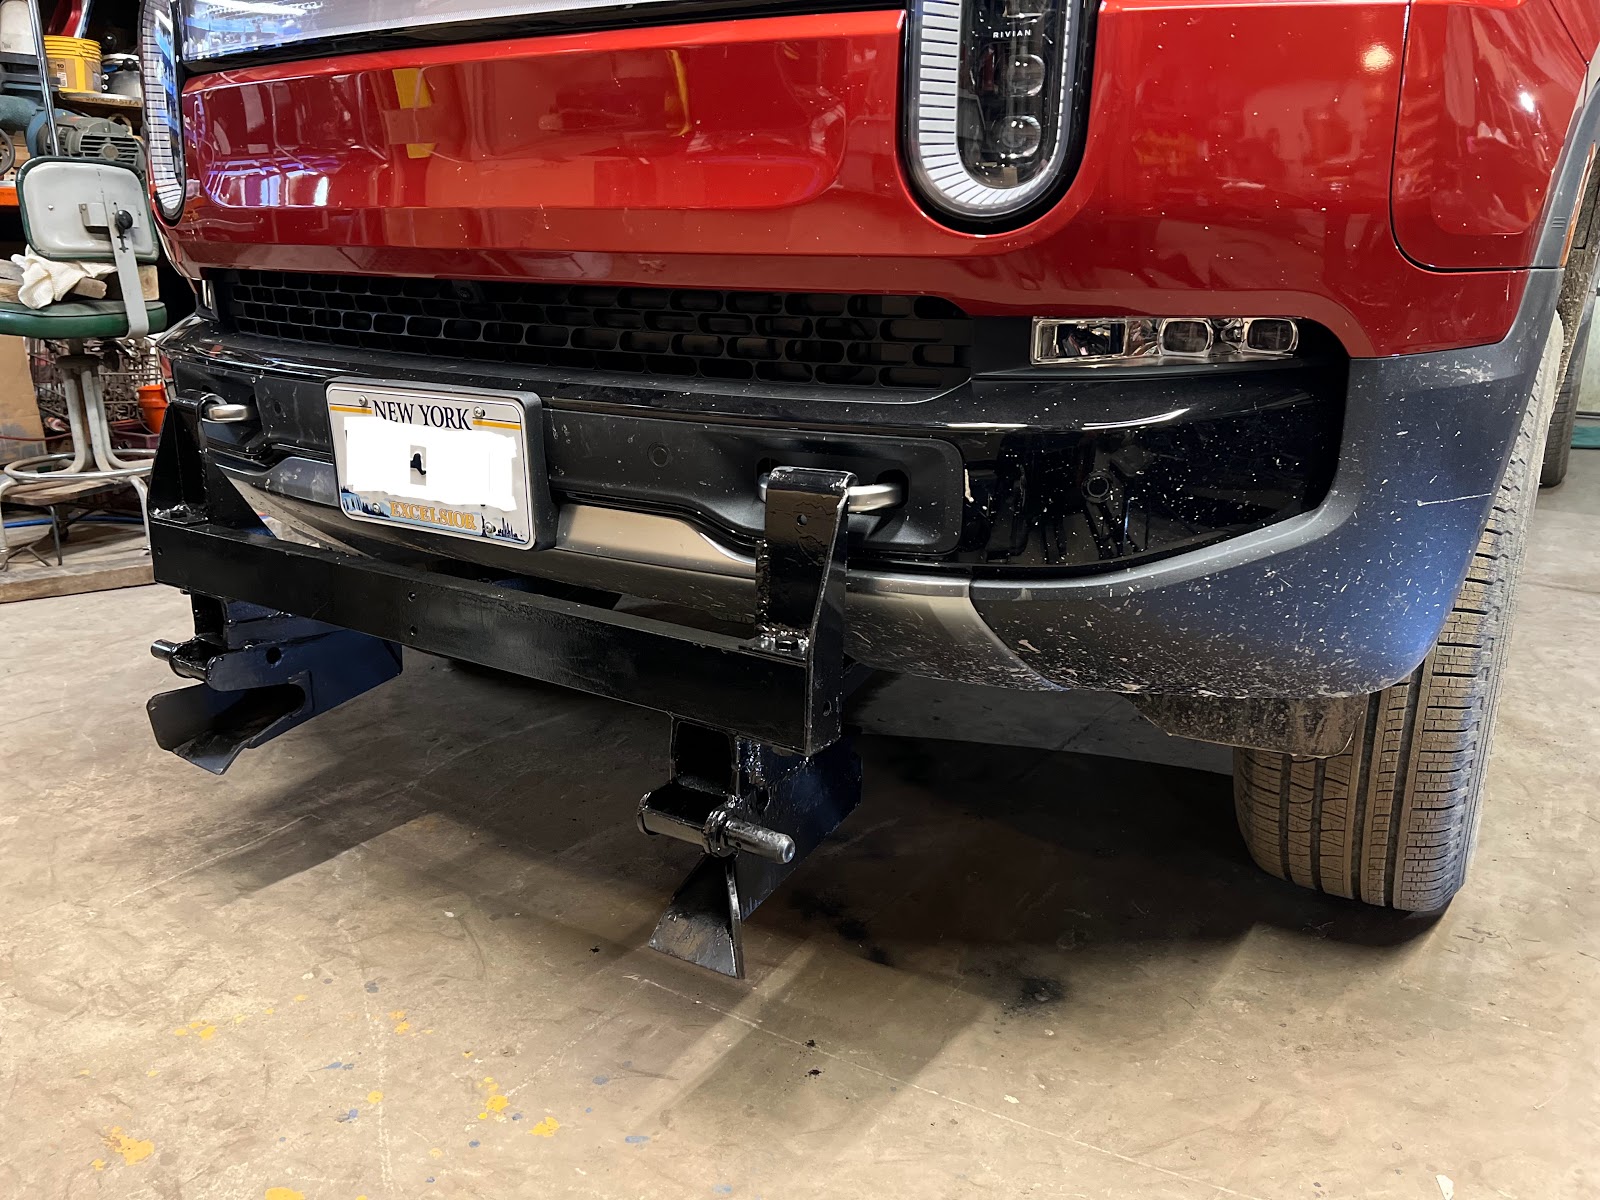
I examined the recovery hooks that look more like handles on the front bumper. I wondered what the designers were thinking. 💁
In a front end collision these are made to shear the side bolts holding the loop in the rectangular frame bolted to the front of the main frame members.So I had to design the plow mounting so the bulk of the horizontal pushing force was not on the loops. More about that later. I estimated that the weight of the plow and frame, the vertical force vector, could be carried by the loops. After all each loop should be able to bear at least the weight of the truck stuck in mud, and half full of water. A very ugly scene for sure.😢
2 pieces 3"X12" cold rolled steel, heated red hot and bent around a 7/8" mandrel rod.
The two recovery handles on my truck are 36.5" c-c and offset from the truck center line by about 79°, 11° from straight across in opposite directions. Next I cut a 39.5" piece of 3" channel iron. Then four 3"x2" rectangles with a 3" side cut at 11°, all from 3" x ¼ " thick flat stock and tack welded it all together to fit as here:
Not hanging on yet, I initially bolted it just incase, and had yet to trim off the excess bottom plates. Also added 2 gussets on the outsides, making the total width 40". Next I cut 3 pieces 3" channel 24" long and 2 pieces 8" long cut flat at 45° and laid them out like this:
The 2 8" pieces inverted on top of the 2 24" pieces, 45° end sloping down away from view point.
Here the idea is to maintain 1 to 2" of clearance to the truck going down around to the back. The large flat horizontal surface of the 3rd piece of channel at the back should land right between the big bolt heads underneath, securing the leading leg of the 'A' frames of the lower front suspension. A portion of the horizontal forces pushing the plow will be translated to push up under the vehicle where it is in contact with a strong area of the vehicle. Total distance back to front of the frame is 26".
Still getting used to MIG welding having always used stick welding before this project. But it was cold outside so I did not want to run my exhaust fan all the time. Cleaning the steel is much more important when MIG welding.
The exact angle at which the right and left channels go back to the flat-side-up back channel will depend on the spacing and attachment method for your particular plow. I had an 8' Western 'UltraMount' plow to work with. Probably more plow than I need for just my own driveway. See here for how UltraMount works. I will be looking for a lighter 7' Western HTS plow which, hopefully will fit the same receivers as the bigger plow. The third point of attachment for this plow frame is the rear trailer hitch. Yes I will sacrifice a couple of inches of ground clearance. The Rivian can vary its ground clearance from 9 to 15" so no problem there. Could even use its ability to move up and down to hook up the plow frame to the recovery handles. The dotted line near the top of the hook over the recovery handles represents a drive up, latch-on, mechanism to keep the plow adapter frame from jumping up off the recovery handles. The other dotted line represents another reinforcing gusset.
Here is a picture of the push bar to the drop trailer hitch.
The the Rivian is essentially flat on the bottom, just a small 1" bulge under the rear motor housing. This permitted a 16' length of 2 x 2 x 0.125 square tube to run between the drop hitch and the frame at the front of the vehicle to take the brunt of the horizontal pushing forces.
Here I fitted the nearly completed frame to the plow, checking for any issues. Note the receiver tube for the long push bar to the drop hitch.
This plow is way heavier than what I plan to use.
Just testing, I noticed that the Rivian self adjusts the ride height to compensate for the additional weight in front. Very nice!
At last, continued after some snow arrived last night:
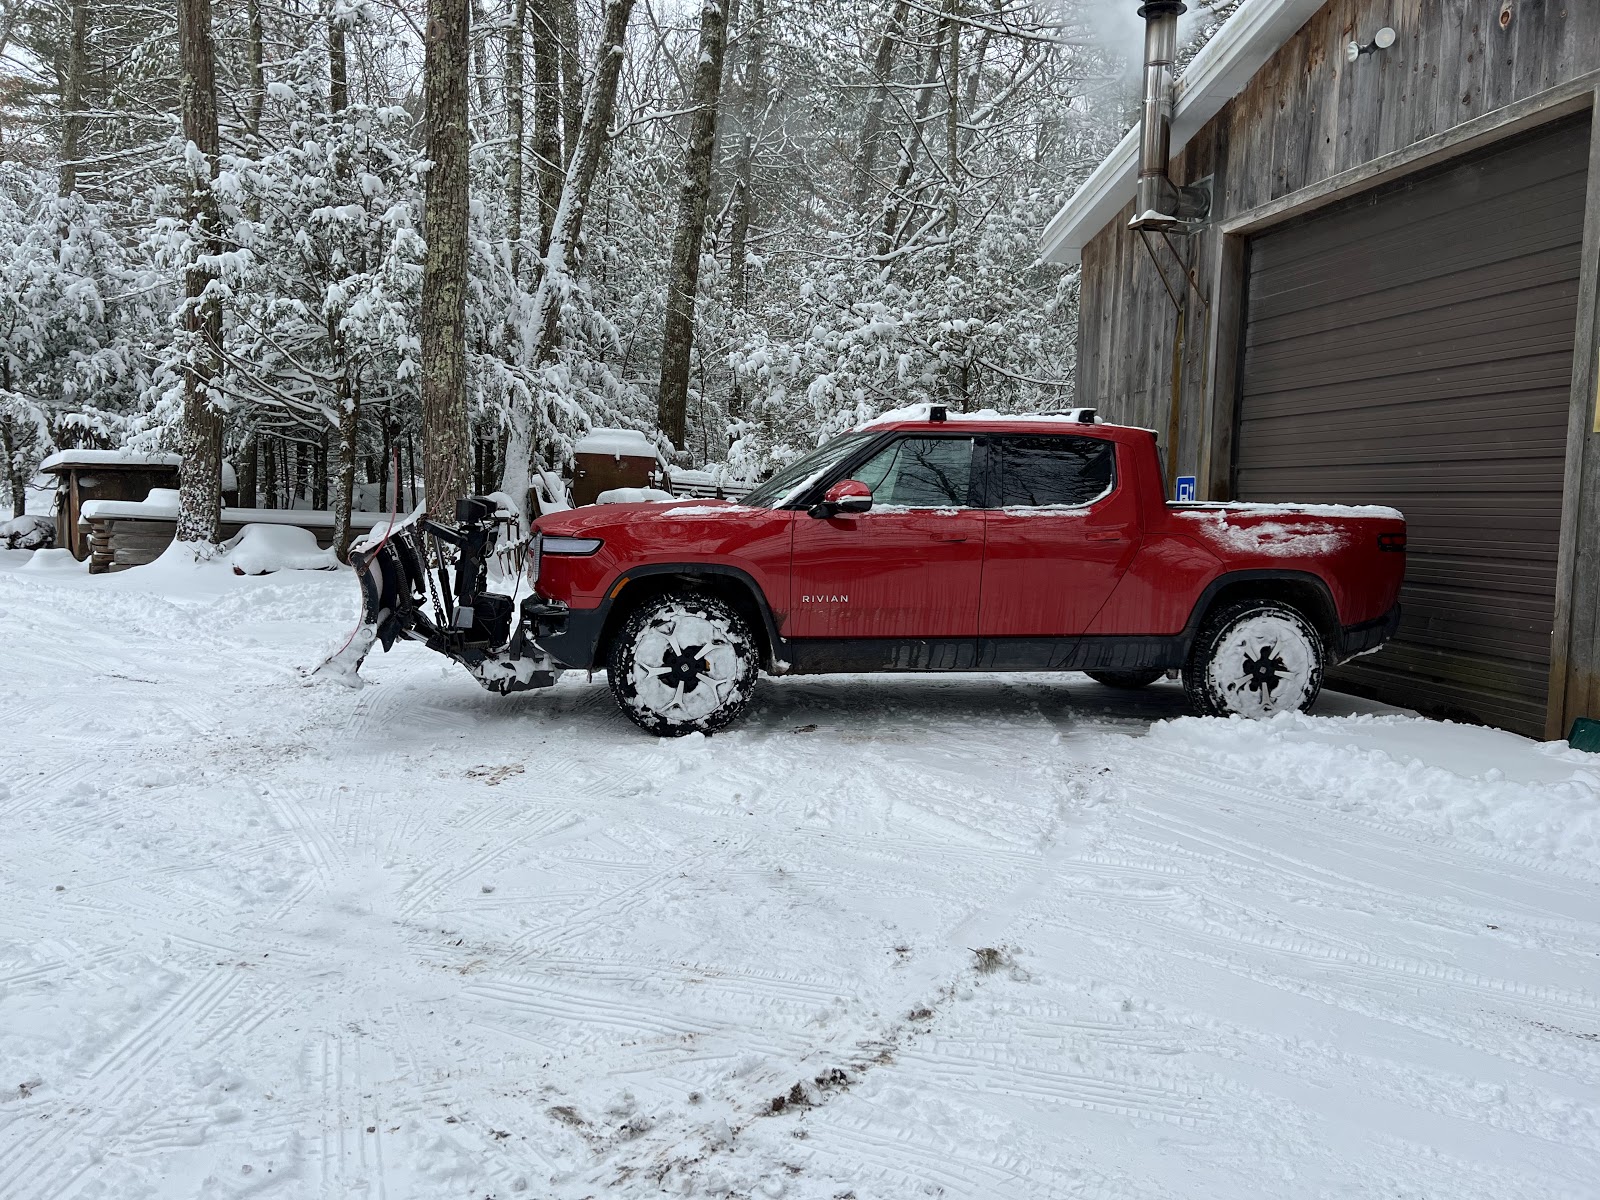
Picked up a lighter Western Plow with a polyethylene blade board (?). I mounted the battery on the plow just under the hydraulic pump. With this slightly lower 90" wide blade I won't need the lights mounted on the plow as the Rivian's head lights are high enough to light up over the plow when lowered. A large marine deep discharge battery ran the plow for ~ 2 hours plowing 6" of wet snow today on the last day of February here in NY, showing no sign of slowing down. I left a socket hanging out of the battery case to plug in a charger when I got done,
I had been waiting most of the last 2 months to get a little snow to test snow plowing with an electric truck. I am totally blown away at how much easier and more comfortable it is to plow in a 4WD EV. No wheel hubs to lock, no transfer case, no roaring engine, just a 200HP electric motor on each wheel through a short shaft and CV joint for an ultra smooth non slip 800HP to ground. None of this using the ABS brakes to keep the wheels from spinning wildly on ice and wasting brake pads and rotors.
My driveway with the loop at the far end is about a quarter mile. I went up, down and around the loop about six times and used up about 12 miles of my starting range of 256 miles. So not great mileage pushing snow, but even at 1.5 mi / kWh that is 8 kWh used @ $0.20 per = $1.60 to plow my driveway. (If I had to pay for electricity to charge my car. :-)
I needed 5 wires to be able to control the plows 4 movements. I bought a good quality joy stick mounted in a plastic electrical box, 4, 5 amp Shottkey diodes and 20' of #16 5 conductor rubber covered cord to hook it all up. It was easy to route the cord in under the frunk hood to the driver side window closed to within 1/2 inch. The 2X4" box with the joystick fits perfectly in the seat right next to me or on the phone charging pad. This should not cause any problems with the phone charger since the box is thick pvc holding the metal parts far enough away.
The completed plow mount with battery box and joystick.
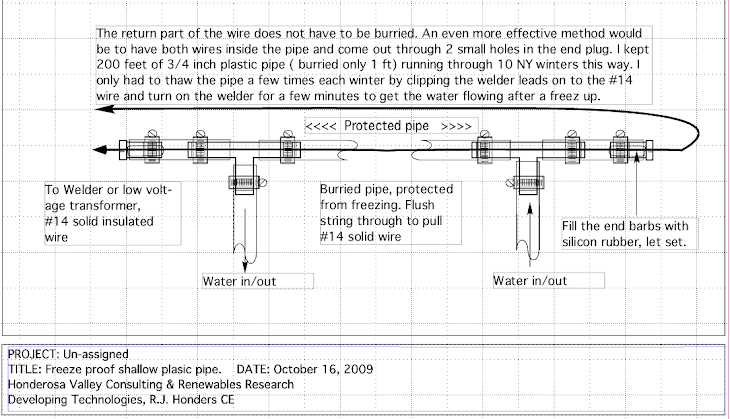
DIAGRAM